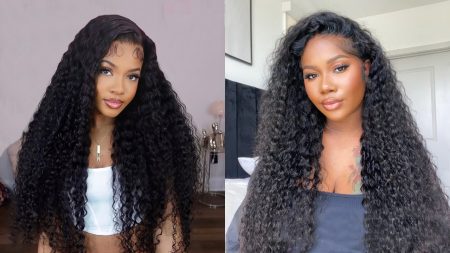
Hair extensions have become a popular accessory for women looking to add length, volume, and versatility to their natural hair. Whether you desire long, flowing locks for a special occasion or simply want to switch up your look without committing to a permanent change, hair extensions offer a fantastic solution.
Clip-In hair extensions installation.
Clip-in hair extensions are a great option for beginners as they are easy to install and remove. They are also gentle on your natural hair, making them a popular choice for occasional wear. Here’s a step-by-step guide to installing clip-in hair extensions:

Step 1: Prepare your natural hair.
Start with clean, dry, and styled hair. Gently comb through your natural hair to remove any tangles and knots. If you have fine hair, tease the roots slightly to create a better grip for the clips.

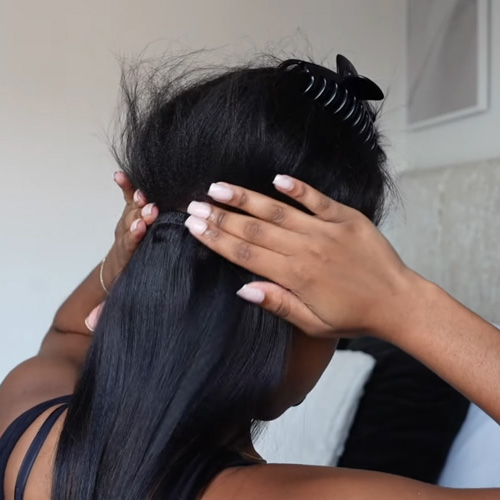
Step 2: Section your hair.
Divide your hair horizontally into sections, starting from the nape of your neck. Use hair clips to secure the upper sections, leaving the lower section of your hair loose.
Step 3: Attach the extensions.
Take a weft of clip-in hair extension and open all the clips. Position the extension at the root of the loose section, just below the parted hair, and snap the clips shut. Make sure the extension is secure and comfortable.

Step 4: Blend the extensions.
Release the clipped sections of your natural hair and gently comb through them to blend with the extensions. Use a flat iron or curling iron to style your hair as desired, ensuring the extensions are well integrated.
Tape-In hair extensions installation.
Tape-in hair extensions are semi-permanent and require a more involved installation process. It is recommended to seek help from a professional stylist for a seamless and long-lasting application. Here’s an overview of the tape-in hair extensions installation process:
Step 1: Cleanse your hair.
Start with freshly washed and dried hair. Avoid using any styling products before the installation, as they can interfere with the adhesive of the tape-ins.
Step 2: Section your hair.
Divide your hair into horizontal sections, beginning at the nape of your neck, and secure the upper sections with hair clips.
Step 3: Apply the extensions.
Peel off the backing of the adhesive tape on one side of the weft. Sandwich your natural hair between two tape-in wefts, ensuring they are evenly spaced and comfortable. Press the tape firmly to secure the extension in place.
Step 4: Repeat the process.
Continue the process of applying tape-in extensions to each section of your hair, working your way upwards towards the crown of your head.
Step 5: Blend and style.
Once all the extensions are applied, release the clipped sections of your natural hair and blend them with the extensions. Style your hair as desired, but be gentle to avoid damaging the extensions.
Best for natural hair: Clip-In or Tape-in extensions?
Let’s compare clip-in and tape-in extensions to help you decide which option may be best for your natural hair:
Clip-In hair extensions:
Pros:
Easy application: Clip-in extensions are straightforward to apply and remove. You can do it yourself at home without professional assistance.
Versatility: Clip-ins offer versatility as you can easily install and remove them whenever you want. They are ideal for occasional use, like special events or specific hairstyles.
Minimal damage: Clip-ins are gentle on natural hair when installed and removed correctly. There is no adhesive or tape involved, reducing the risk of damage.
Tape-In hair extensions:
Pros:
Natural look: Tape-ins lie flat against the head, providing a more natural and seamless appearance. The extensions blend well with your natural hair.
Comfortable: Once applied, tape-ins feel lightweight and comfortable. You won’t feel any additional bulkiness.
Easy styling: You can style your hair as usual with tape-in extensions without worrying about clips or bonds.
Detaching Tape-In and Clip-In extensions from your hair.
Detaching Tape-In hair extensions:
Step 1: Gather the required tools.
Hair extension adhesive remover or alcohol-based solution.
Tail comb or rat-tail comb.
Wide-tooth comb.
Hair clips.
Step 2: Section your hair.
Divide your hair into manageable sections using hair clips. This will make the removal process easier and prevent tangling.
Step 3: Apply the adhesive remover.
Using a cotton pad or a small brush, apply the hair extension adhesive remover or an alcohol-based solution to the tape bonds. Allow the solution to soak into the tape for a few minutes to weaken the adhesive.
Step 4: Gently separate the tape bonds.
Take your time and use a tail comb to gently separate the tape bonds from your natural hair. Be cautious not to pull or tug too hard, as this can cause hair breakage.
Step 5: Comb out the extensions.
Once the tape bonds are separated, use a wide-tooth comb to gently comb out the extensions, starting from the ends and working your way up towards the roots.
Detaching Clip-In hair extensions:
Clip-in hair extensions are temporary and easy to remove. You can do this on your own without any special products.
Step 1: Locate the clips.
Find the clips on each weft of the extensions. They are small, usually snap-on clips that hold the extensions in place.
Step 2: Release the clips.
Using your fingers or a small tool, gently release the clips by opening them. Start with the clips at the bottom and work your way up to the top of each weft.
Step 3: Remove the extensions.
Once all the clips are released, gently pull the extensions out from your hair, starting from the bottom and working upwards.
Step 4: Comb out any tangles.
After removing the extensions, use a wide-tooth comb to detangle your natural hair, working from the tips to the roots.
In a nutshell.
By choosing the right extensions, preparing your natural hair, and following the correct installation steps, you can achieve a seamless and stunning look. Remember to care for your hair extensions diligently to keep them looking fabulous for as long as possible. Enjoy your new, gorgeous locks!