The bantu knot is exquisite. Mel B, Rihanna, and Beyoncé are just a few entertainers who have easily made them appear royal. I had been hesitant to attempt them though since I wasn’t sure whether I possessed the proper facial symmetry to carry off the time-honored look. Have you ever wished to experiment with your natural hair without committing to anything long-term? We fully comprehend.
Updating your appearance with bantu knots is a wonderful place to start if you’re seeking for a new protective style. When it comes to adaptability and maintaining the structure of your strands, bantu knot techniques are fantastic. Do you intend to join the bantu knot hairstyles trend? Learn how to do bantu knots and bantu knot outs as you read along and find out about other hairstyles you may attempt.
Bantu knots: what is it?
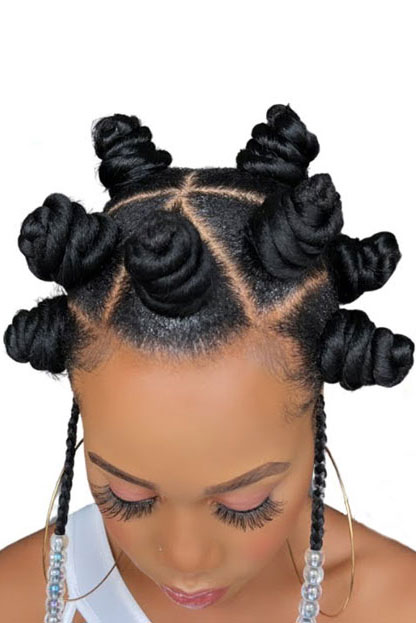
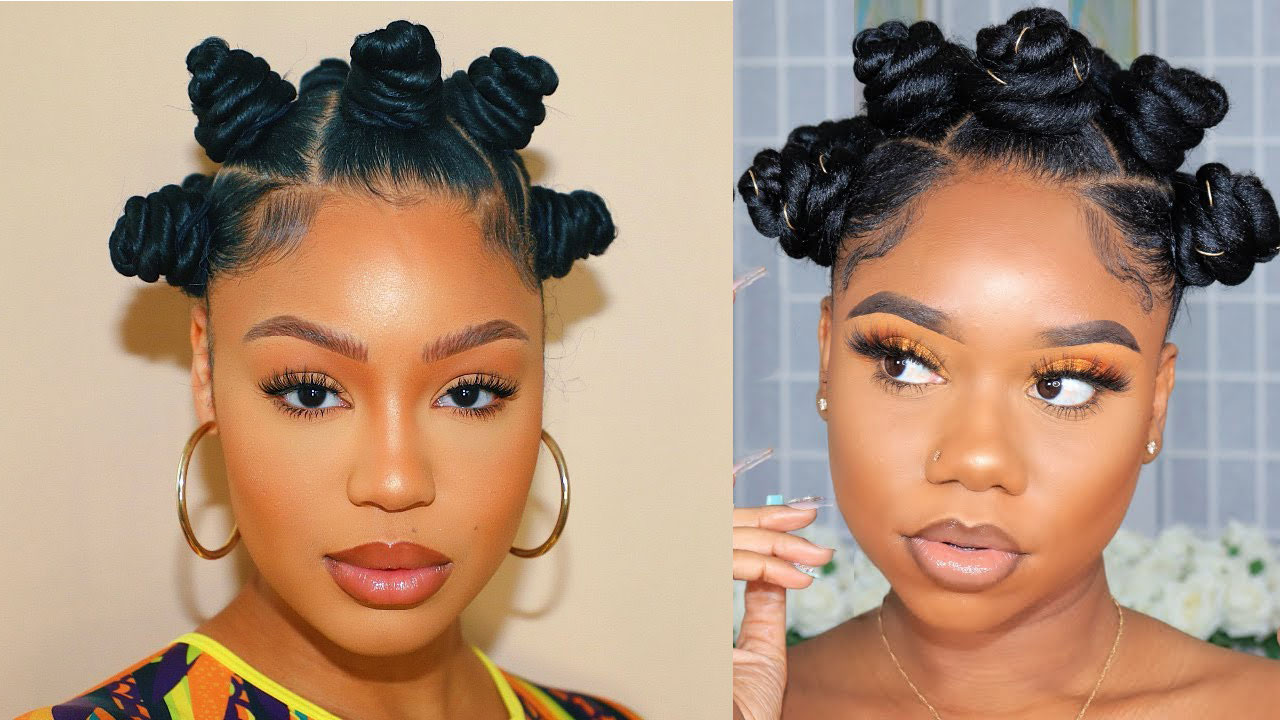
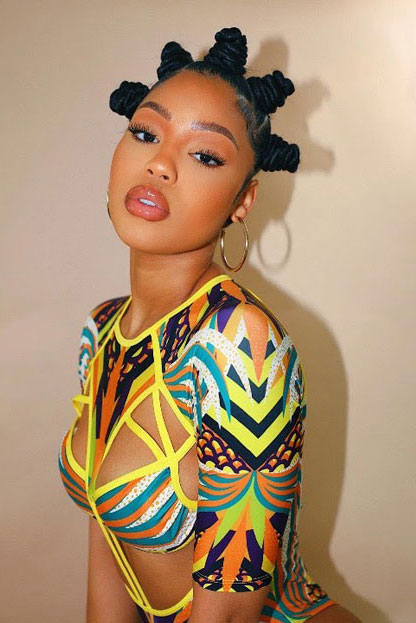
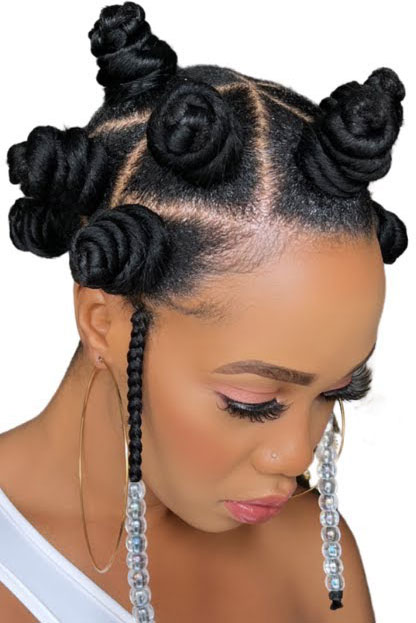
The bantu knot, a hairstyle in which the hair is divided into sections, twisted, and coiled such that the hair stacks onto itself to form a spiralling knot, is a creation of the Zulu people of southern Africa. Contrary to popular belief, bantu knots are not hair knots. Bantu knots are a vintage hairstyle that feature small buns all over your mane. Bantu knots function as a protective style and help draw attention to your features. They are a terrific method to keep your strands neatly tucked away. We call that a win-win situation now!
What exactly is bantu knot outs?
It only seems sense that we also teach you to bantu knot outs now that you are well-versed in bantu knots. The bantu knot out is an improved version of the conventional bantu knot that enables you to wear your tiny buns for as long as you desire before unravelling them to reveal bouncy curls.
Bantu knot outs provide your strands tighter, more defined curls than than the stretched-out waves of the very popular twist out hairdo. As you can see, bantu knots have two uses: as a hairstyle and as a method for creating heatless curls!
What advantages do bantu knots have?
Black women have always been drawn to the bantu knot, which has recently become increasingly well-known among all women seeking a sweet and straightforward hairdo. What are the benefits of this hairdo then?
1. Keep your natural hair protected.
Bantu knots are a fantastic alternative to headband and lace front wigs for protective hairstyles. Because of this, you may experiment with it without damaging your hair. Bantu knots, on the other hand, prevent hair loss without the use of heat. They are an inexpensive method to alter your appearance. Hair of almost any length and variety may be knotted. They are simple to keep up.
2. Curl your hair without using heat.
Bantu knots are a popular method among females for achieving curly hairstyles. For rapid curls, you may also do bantu knots in a short period of time. For all hair types, this is an excellent technique to get tight curls or waves without using heat.
3. Bantu knots are really simple to make.
The bantu knot is quite simple to do, and you don’t have to worry about the cost if you decide to visit the beauty salon for the ideal haircut. One of the most affordable options for installing protective hair is the bantu knot. The bantu knots hairstyle is the least expensive protective hairstyle when compared to others, such as butterfly locs, box braids, and so on. The installation usually runs between $50 and 70.
As an added bonus, you can construct the bantu knot hairstyle on your own with just a comb and your hands. I’ll teach you how to do it.
What are the steps for making bantu knots?
Are you willing to give bantu knots a try? We are convinced that you can create this look on your own, unlike many protective hairstyles that require a quick trip to the salon. You may learn how to tie bantu knots and knot outs like an expert by following the instructions we’ve provided below.
Step one: Get your strands ready by washing, conditioning, and layering hair treatments.
You must properly wash your hair before attempting the bantu knots because the majority of it will be exposed, therefore you must maintain the scalp pristine. Using a fine-toothed comb, split your hair into several equal-sized pieces beginning at the back after you’ve washed it. In order to make the ideal set of bantu knots, your hair must first be adequately hydrated. Set the step with a moisture conditioner that will gently wash, hydrate, and give your strands a brilliant sheen.
For a base that is well-nourished, I prefer to start with well cleaned and deep-conditioned hair. Bantu knots can also be used on stretched, dry hair. Your hair type will influence the kinds of products you use and how you stack them.
Step two: Blow-dry your hair.
Apply leave-in conditioner to a segment of your newly split hair from roots to ends after misting it with water. To create a flawless bantu knot, apply a tiny quantity of style gel to this section of your hair.
Step three: Twist your hair.
Twist your hair from root to tip in the same area that you just split, making sure to wiggle all of it and not leave any out. Just through your hair, twist it tightly like a rope, simple like that. Make a bun or knot by twisting the hair in the opposite direction. Avoid making it either too tight or too loose, which might impair your ability to think clearly.
Step four: Tie a knot or a bun, set it, and secure it.
To make a knot or little bun, take the twisted hair and wrap it around counterclockwise. Your bantu knots will resemble a pyramid or funnel if you have longer hair. Short hair will make them appear more like rosebuds. Your hair’s tail should be tucked within the knotted bun. Your ends could stay in place if your knots are secure. If not, put the end inside the bun with a bobby pin or hairpin.
Step five: DIY your bantu knots.
Choose some rubber bands and encircle your bantu knot in accordance with your reference. You’ll end up with a lovely bantu knot after doing this, and you may keep doing it until there are no more hairs on your head, then the whole process is done.
Things you should be aware of at night.
You may wear Bantu knots for a few days in a row, but to keep your look, it’s crucial to take care of your hair even while you sleep (particularly if you want to avoid frizz and breakage and maximize the use of your style).
How long should a bantu knot remain in place?
Bantu knots are regarded as a protective style, as we noted above, but they don’t hold up to the same use time as other protective styles you know and love. Bantu knots should only be in your hair for two weeks instead of the typical six to eight weeks. Your hair may rapidly start to seem unkempt since you aren’t utilizing any extensions to get this look.
Bottom line.
Without a doubt, the bantu knot is a chic and classic protective hairdo. I hope you can attempt the bantu knots today if you are curious about them and have never tried this hairstyle before. Just follow my directions and you’ll learn how to tie bantu knots, which you already know how to do.
Related Articles
8 Cute And Easy Rubber Band Hairstyles For 2023